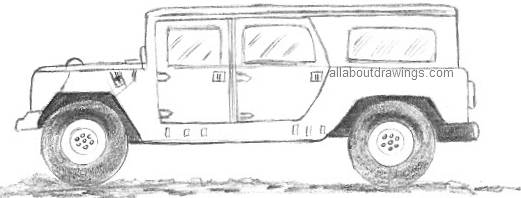
There are 4 simple steps to this process, I think they will provide a good foundation to enable you to do your own successful car sketches.
When you teach yourself to draw, it won't hurt you to experiment with shortcuts. It doesn't matter if they don't work for you because you win either way. Practicing is the only way you learn.
We're all different and what works for one person, doesn't always work for another. That's why I'm encouraging you to try this and to adapt it to suit yourself.
First up, we need to see the car in an uncomplicated way. So, let's forget two dimension and three dimension. We need to be able to draw the basic car first, without worrying about extra stuff.
The best way to do sketches of cars, is to look at the side-on view of a car. By removing proportion and dimensions, you have streamlined this task already. Find a good, clear photo or picture that you can copy. Remember, it has to be just the side view of the car for the easiest aspect.
Now, let's break this down into four do-able parts.
- Measure the outside of your picture and draw a border with the same dimensions on your paper.
- Measure the bonnet and then mark the points on your paper in the same position that your bonnet sits within your picture. Make small strokes that you can see. You can use your pencil to do these measurements or, if you prefer, you can use a ruler.
- Now measure from the end of the bonnet to the end of the roof. Mark these points on your paper. Don't forget to mark the height between the bonnet and the roof.
- Make the last measurement and mark from the end of the roof to the end of the boot.

All that's left now, is to have a go at copying the car to the best of your ability. Just look at the car closely and sketch it as you see it.
You will find that those little marks come in very handy. This action cuts your work time in half and you will have completed some decent sketches of cars. Yes, that's right, you drew those!
If you want to draw a car outdoors, make yourself comfortable and measure your points by using your pencil. You can do this by holding your arm straight out (stiff) in front of you. Close one eye to avoid double vision. Slide your thumb along your pencil to get your measurements. You need to be a good distance from the car to be able to measure this way.
The important thing, when you are learning how to do sketches of cars, is to make the task as easy as you possibly can. Everyone learns how to draw by taking tiny steps.

Don't just read this and think you'll remember it. Go on, try it out!
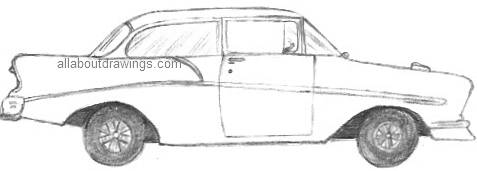
I tried to sketch this sedan very quickly.
It looks rough but I will overcome that with a lot of practice. Some people can sketch and it comes out brilliantly. I know I'll be able do it soon. And, so can you!
This method can be applied to all sorts of subjects - animals, objects, whatever you please.
This is a drawing aid and, one day, you'll discover that you just won't need it anymore.

I started off by putting every single mark on my paper, now I only do 2 or 3 marks just as a time saver.
It's a great thing when you can do sketches of cars with ease. All it takes is practice.
The letters of the alphabet were originally pictures and symbols. When we were learning how to write, we were actually being taught how to draw. It didn't seem hard, did it? You can do this, you only need the desire to draw and you're halfway there.
No comments:
Post a Comment